jeudi 3 mars 2016

Piston circlip installation tool.


Installing the circlips in pistons is one big PITA so I am very happy that I figured this one out.

A length of half-inch copper water pipe with slots cut lengthwise at one end to reduce the diameter.
File the circumference so that it will enter into the hole in the piston and a screw clip to close the slots
Next I made a plunger from a piece of steel tubing (wood would be easier...) filed and sanded to fit the interior of the copper piece.


Push the circlip into the copper tube at a 90 degree angle to how it will fit into the piston. Push it in far enough that you can turn it back 90 degrees without it popping out.

Next insert the plunger in the rear of the copper tube, push the circlip to the very lip of the copper tube so that it is ready to slip into the piston. To do this it is necessary to place the copper tube front end down on a hard surface, with a good deal of pressure, while pushing the plunger down.

When the circlip is properly placed place the tool vis-a-vis the piston's wrist pin hole, press it into the hole as tightly as possible and press the plunger again to pop the circlip into the piston.

It may not work the first time, but after a couple of tries it will be in there. You will have to nudge it into the groove using the plunger or a small screw driver.

(I may make a video at some time...)

A sprocket wrench to hold the sprocket while loosening the drive side crankshaft bolt

Here is my sprocket wrench, made from a length of square tubing, a chain and an old wrist pin.
To get the right fit you can play with the length of the tubing, the length of the chain and the diameter of the "pin" (use a piece of wooden dowel?). This one cost me nothing because I had everything lying around... I didn't even have to cut the tubing, what I had was just about the right length. It is a bit loose in the pictures, but it worked like that. I used an old wrist pin with some tape wrapped around it to block the chain at the other end of the tube... I should try something a bit larger to tighten it up.


The engine in the picture is a JICA engine with a clutch, the sprocket wrench would be of no use on it... but it was the only engine in the house with a sprocket on it...

Help with installing crankshaft seals without disassembly of the crankcase.

I acquired a third CRG S30 T1 JICA engine and a leak test revealed a leaking seal. 

Removal
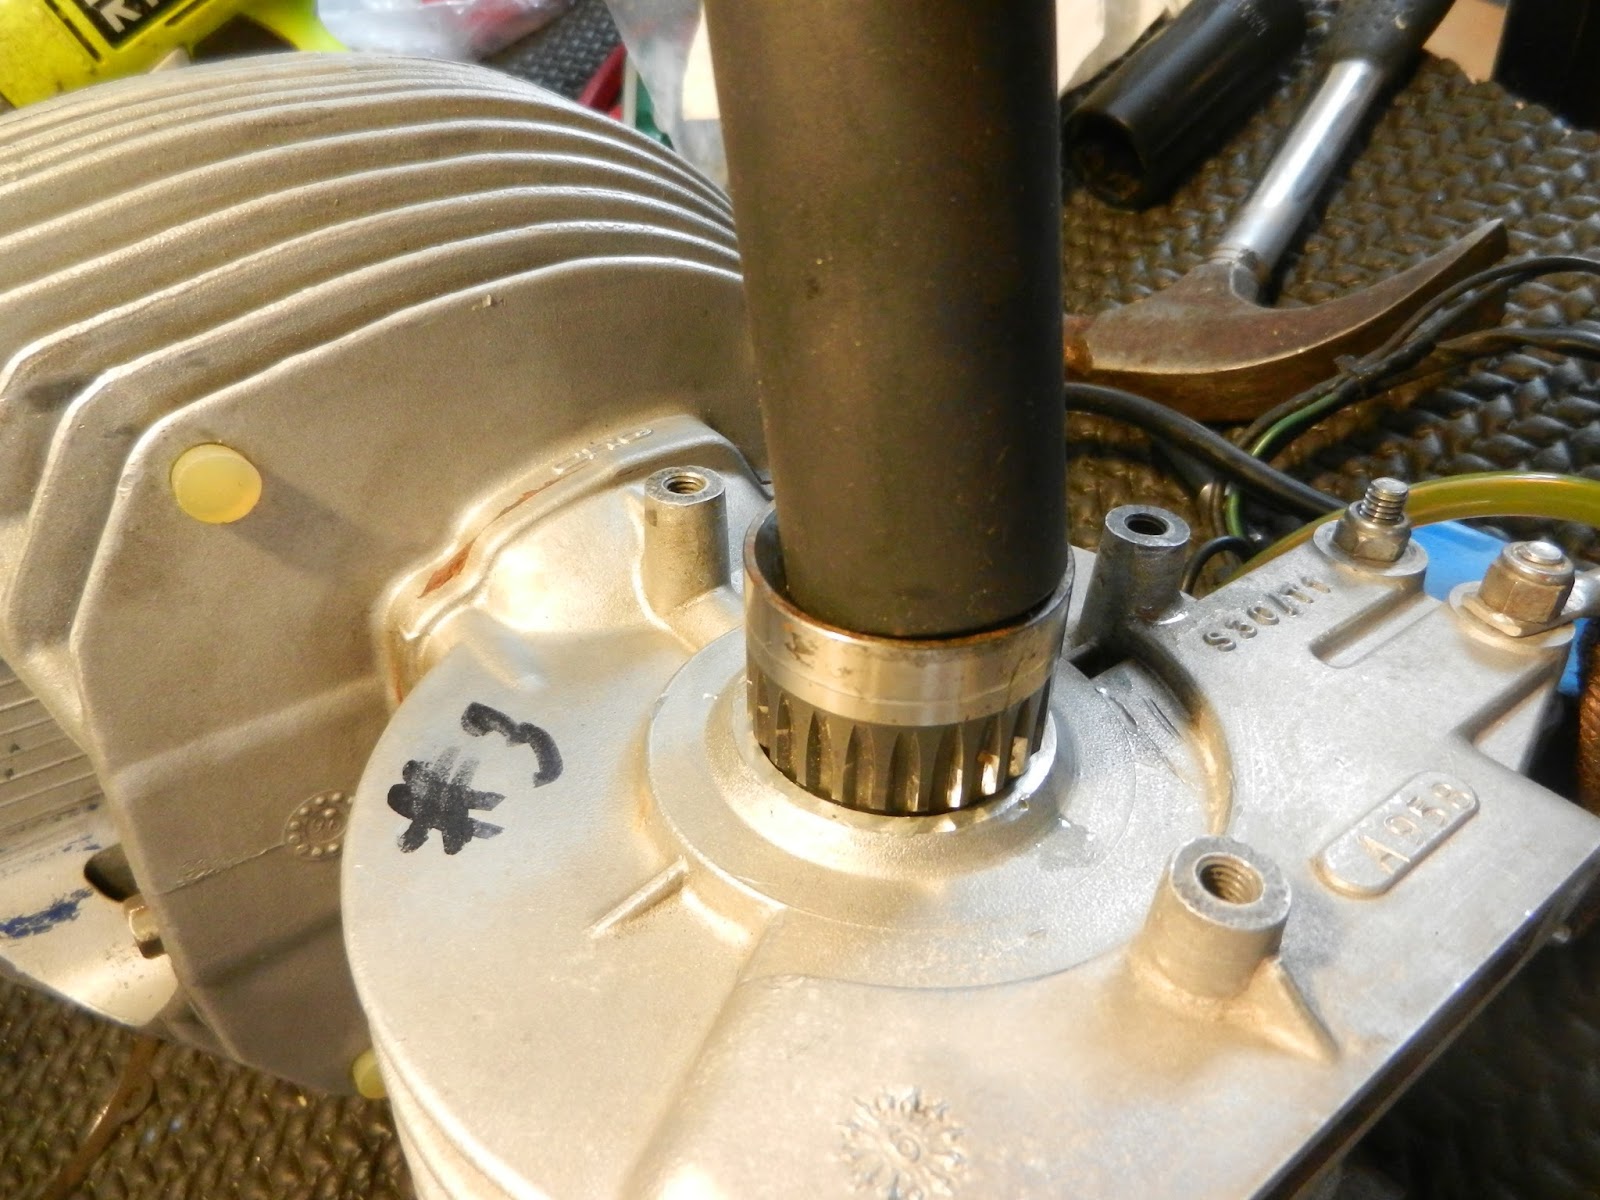
Since the clutch was off access to the seal was easy though removing it was tricky. I tried screwing in small self tapping screws, but the outside of the seals is metal, so I drilled 2 small holes to start the screws and was able to pull the seal out. The problem was there were some small pieces of metal from the drilling that fell in on the bearing, I hope I got them all out using my Shop-Vac. Next time I will try something else, like a small screw driver, being careful to not scratch the crankshaft or the casings.

Installation
I thought that I could use a deep socked, 7/8'' or larger, but the crankshaft is too long on the JICA engine because of the clutch. So looking around the house and garage I came up an oil pump sleeve from my Porsche 924S. Just the right size to extend the socket and tap the seal into place. Another possibility is an old crankshaft bearing, which would be more common than old Porsche parts in a kart owner's garage.


Introduction and explanation

In 2014 I pulled my old Tony Kart out of the back of the garage where it had been languishing for 14 years with the intention of doing some lapping. I got it running and promptly blew the CRG JICA engine first time out.

With no budget to pay someone else to repair the engine I have had to figure it out myself, thus started the process of learning to repair and rebuild 100cc kart engines. They are very simple so with a bit of practice you can do a complete overhaul with basic knowledge and tools.

An ad I put online for spare parts got a response from Robert who had 5 engines (that later became 7) that needed work.

Since than I have been working on and learning about these engines, so far I have done partial or full rebuilds on these engines.
my original CRG JICA (hone, piston and rings)
3 Yamaha KT100s (one took a hone, piston and rings, crankcase seals and crankshaft bearings)
a Titan JICA (hone, piston and rings, crankcase seals and crankshaft bearings)
2  Vortex JICAs
2 Ital Sis MV21 ICA rotary valve engines (both needed, a hone plus piston and rings)
Rotax DSB ICA rotary valve engine (compression test - leaking seal on the rotary cover)

I have come up with some tricks and home made tools that I would like to share. If others can add their tips and tools contact me and I will add them to the blog.

I have been following this Facebook page...

Proper Karting - Formula 100cc - Rye House - Hoddesdon Kart Club

... which has taught me a huge amount about 100cc 2-stroke kart engines in general and specifically on the engines from the 1990s that make up my collection. I like the simplicity of the air-cooled engines and during the '90s they reached the high point of their development.The above site gives one access to a lot expertise; most of my questions (sometimes dumb) have been answered there.

Also I have the following very useful books:
"The Complete Yamaha KT100" - by Jean L. Genibrel
"Le guide technique du kart - moteurs de kart 2000" - by J.P. Mechin

The blog is very much a work in progress... I start pages before having pictures to finish them, just so I won't forget. I will work at getting them all completed eventually.